An arm with three joints: how trigonometry turns the angles into the gripper's position, how to find angles that bring it to a point, two poses for one point, and what the joint limits take away from them.
Step 1 of 7 · Joints
Step 1 of 7
Joints
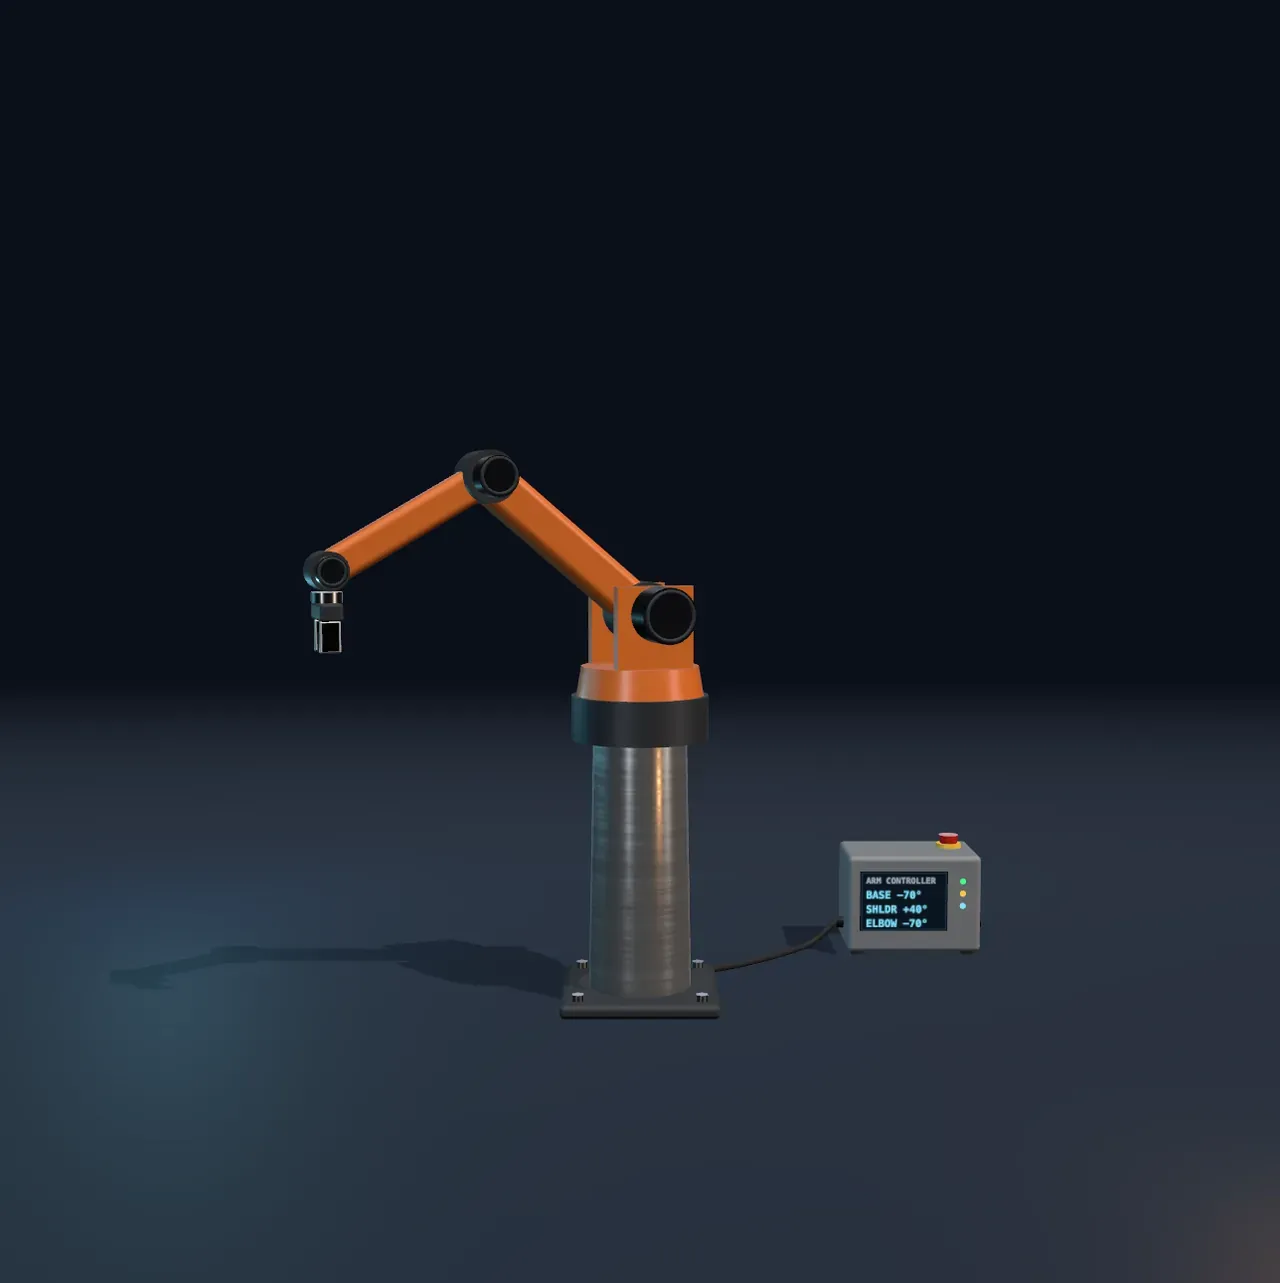
A robot arm is a chain of rigid links and turning joints. The arm in the Scene has three joints: the Base turn turns it about an upright axis, and the Shoulder and Elbow swing it within one upright plane. The wrist keeps the gripper pointing straight down. Each joint is driven by a servo motor: a motor with its own encoder and controller, a small feedback loop like the one in the last Lesson, that keeps moving the joint until its angle matches the one asked for.
The chart beside the Scene shows the gripper’s position in metres, from the floor under the base: to the right, towards you and up.
Step 2 of 7
From angles to a position
The shoulder is 0.80 m above the floor. The upper arm, 0.42 m long, points at the Shoulder angle above the horizontal. The forearm, 0.36 m long, is bent relative to it by the Elbow angle, so it points at the shoulder’s angle plus the elbow’s. The gripper hangs 0.14 m below the wrist.
This is where trigonometry comes in. A link of length at an angle above the horizontal goes across and rises . Add the two links and you have the gripper’s position. That is forward kinematics, from the angles to the position. The joints are locked now.
Step 3 of 7
From a position to angles
A factory task is written in places, not angles: pick up here, put down there. So the controller has to work the other way, from a position to the angles that reach it. That is inverse kinematics, and it is harder: one position can have more than one answer, or none.
Try doing it by hand. The Base turn is locked, since it changes neither the distance from the axis nor the height.
Step 4 of 7
Two poses
A triangle sets the shoulder and elbow: the upper arm, the forearm, and the straight line from the shoulder to the wrist. All three sides are known, so the triangle is known, but it can be flipped to the other side of that line. So most points have two poses: elbow up and elbow down. Show the workspace draws the other pose as a ghost arm, but it is locked now. Predict first.
Step 5 of 7
The edge of the workspace
All the places the gripper can reach make up the workspace, the see-through shell round the arm. Its outer edge is the arm stretched all the way, so it is close to a sphere of radius 0.78 m, the two links’ lengths added together.
Slowly move the Elbow to 0°, and watch what happens to the ghost arm.
Step 6 of 7
Elbow up, elbow down
The ghost arm shows the second pose, which reaches the same point.
Step 7 of 7
Within the limits
Every joint has limits. Sometimes the second pose would have to go past them.
Loading the interactive version…
Loading the interactive version…
Each step sets up the Scene for you, and a control marked “fixed” stays put for that step.
Practice · Predict, then look
Turn the Base turn from -70° to 90°, without touching the Shoulder or the Elbow. What will happen to the gripper’s horizontal distance from the base axis?
Practice · Predict, then look
Turn the Base turn from -70° to 90°, without touching the Shoulder or the Elbow. What will happen to the gripper’s horizontal distance from the base axis?
Practice · Calculate
Shoulder at 30° above the horizontal and Elbow at -60°. The upper arm is 0.42 m long and the forearm 0.36 m. How far is the gripper from the base axis, horizontally?
Practice · Calculate
Shoulder at 30° above the horizontal and Elbow at -60°. The upper arm is 0.42 m long and the forearm 0.36 m. How far is the gripper from the base axis, horizontally?
Practice · Reach the target
Bring the gripper to a point 0.60 m from the base axis and 0.60 m above the floor, using the Shoulder and Elbow. On the chart beside the Scene the height is , and the distance from the axis is .
Practice · Reach the target
Bring the gripper to a point 0.60 m from the base axis and 0.60 m above the floor, using the Shoulder and Elbow. On the chart beside the Scene the height is , and the distance from the axis is .
Practice · Predict, then look
Shoulder at 0° and Elbow at -90°. Most points the arm reaches have another pose that reaches the same point, with the elbow bent the other way. Can the arm use it here?
Practice · Predict, then look
Shoulder at 0° and Elbow at -90°. Most points the arm reaches have another pose that reaches the same point, with the elbow bent the other way. Can the arm use it here?
Practice · Choose
Move the Elbow to 0°: the arm is straight, and the gripper is on the edge of the workspace. How many different poses of the shoulder and elbow bring the gripper to exactly this point, without turning the base?
Practice · Choose
Move the Elbow to 0°: the arm is straight, and the gripper is on the edge of the workspace. How many different poses of the shoulder and elbow bring the gripper to exactly this point, without turning the base?
Practice · Calculate
Shoulder at 30° and Elbow at -60°. A second pose brings the gripper to the same point, with the elbow bent the other way. What is the elbow angle in that pose?
Practice · Calculate
Shoulder at 30° and Elbow at -60°. A second pose brings the gripper to the same point, with the elbow bent the other way. What is the elbow angle in that pose?
Practice · Reach the target
Shoulder is locked at 0°, and the Elbow is at -90°: the second pose, with the elbow the other way, would need the shoulder below its limit, -30°. Change the Elbow until the second pose is possible too, and press Check.
Practice · Reach the target
Shoulder is locked at 0°, and the Elbow is at -90°: the second pose, with the elbow the other way, would need the shoulder below its limit, -30°. Change the Elbow until the second pose is possible too, and press Check.
Lesson complete. Every practice question here is done.